Deploying and Configuring Lighthouse CI Server
Published Last updated loading views

If you are into web development, you must have come across the term “Lighthouse score”. It is a unanimous way of measuring how well the website performs in the wild. To measure the Lighthouse score, you can use Lighthouse. Lighthouse is an open-source tool that monitors and measures your website’s performance, quality, and correctness.
Lighthouse lets you to start quickly and measure your website directly in the browsers. Some teams and companies run Lighthouse on each change/push. That is where Lighthouse CI (LHCI) steps in. LHCI helps you run Lighthouse in continuous integration (CI) environments.
After LHCI runs, it can upload results to a temporary storage provided by Google, or, it can upload results to a server somewhere. Today, we are going to learn how to deploy and then configure the Lighthouse CI Server so that we can collect Lighthouse scores and compare them over time.
Prerequisites
In this blog post, we will use this blog - Pragmatic Pineapple to measure its Lighthouse score. You can use your website if you want, the idea is to a website to measure.
For deployment, we are going to use Railway. Railway is a platform that makes deploying apps easy, by providing a scalable cloud infrastructure. To prepare, you’ll need:
- A Railway account
- The Railway CLI installed
- GitHub repo with a project you want to test with Lighthouse
Step 1 - Initialize Project
First, we will create a new project to host our Lighthouse server code. I named it lighthouse-server and I’ll host it on GitHub.
I created the directory and went inside it:
mkdir lighthouse-server && cd lighthouse-serverThe project will be simple, with a couple of essential dependencies in package.json as seen below:
{
  "name": "lighthouse-server",
  "version": "1.0.0",
  "description": "Nikola's Lighthouse Server",
  "main": "index.js",
  "scripts": {
    "start": "node index.js",
    "deploy": "railway up --service=lighthouse-server --environment=production"
  },
  "keywords": [],
  "author": "",
  "license": "ISC",
  "dependencies": {
    "@lhci/server": "^0.12.0",
    "pg": "^8.11.3",
    "pg-hstore": "^2.3.4"
  }
}
Also, we’ll need the index.js that will spin up the LHCI server:
"use strict"

const { createServer } = require("@lhci/server")

console.log("Starting server...")
createServer({
  port: process.env.PORT,
  storage: {
    storageMethod: "sql",
    sqlDialect: "postgres",
    sqlConnectionSsl: true,
    sqlConnectionUrl: process.env.DATABASE_URL,
  },
  /* If you need basic auth uncomment this section
  basicAuth: {
    username: process.env.BASIC_AUTH_USERNAME,
    password: process.env.BASIC_AUTH_PASSWORD,
  },
  */
}).then(({ port }) => console.log("Listening on port", port))
Or, if you don’t want to copy text as much, run these two commands:
curl https://raw.githubusercontent.com/nikolalsvk/lighthouse-server/main/package.json > package.json
curl https://raw.githubusercontent.com/nikolalsvk/lighthouse-server/main/index.js > index.js
And we are good so far. We now need to deploy the project to Railway. Let’s see how to do that.
Step 2 - Deploy to Railway
After we created a new directory with package.json and index.js, it’s time to deploy it to Railway.
First, we need to run railway login to log in, and then railway init.
Here’s how that looked on my machine:
$ railway login
> Open the browser? Yes
Logged in as Nikola (nikola@myemail.com)

$ railway init
> Team Personal
> Project Name lighthouse-server
Created project lighthouse-server on Personal
https://railway.app/project/xxxx-xxxx-xxxx-xxxx
Then, we’ll deploy the actual project with railway up --detach (the --detach flag is there to make sure we’re not listening to logs of the server).
The command will complete pretty quickly and it will trigger a deployment on Railway. You can follow the build logs returned from the command.
$ railway up --detach
Indexed
Compressed [====================] 100%
Uploaded
Build Logs: https://railway.app/project/6c35cf2c-d129-4fa4-b224-144a99e96e4b/service/e8f9b583-409a-4109-9604-96e6560bdd25?id=4366fee8-5544-4c0f-a77b-6cb1d969ece9&
The deployment finished under a minute for me and I got this build log:
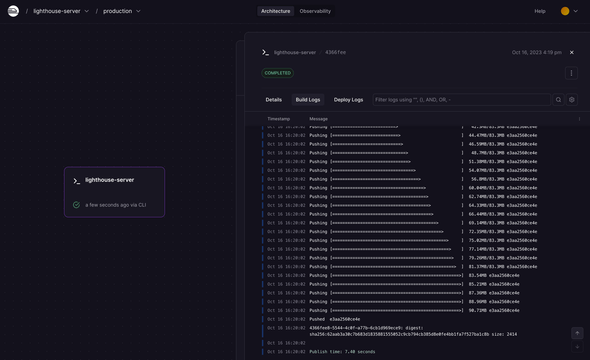
Hm, but the server crashed 🤔. What could be the problem?
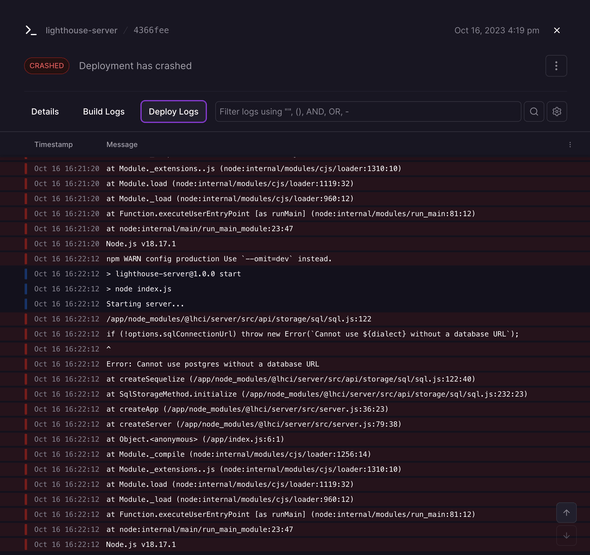
Ah, we don’t have a database for our server. We’ll fix this in the next section.
Step 3 - Add a PostgreSQL Database
To add a database for our LHCI server to store data, we’ll run railway add.
$ railway add
> Select plugins to add PostgreSQL
Created PostgreSQL
Choose a PostgreSQL by pressing Space and then Enter. Now, a PostgreSQL will be added to our personal space on Railway.
Now, we’ll connect the lighthouse-server service we created, and the PostgreSQL database we added.
Open the Railway and select the lighthouse-server service and enter the Variables tab like so:
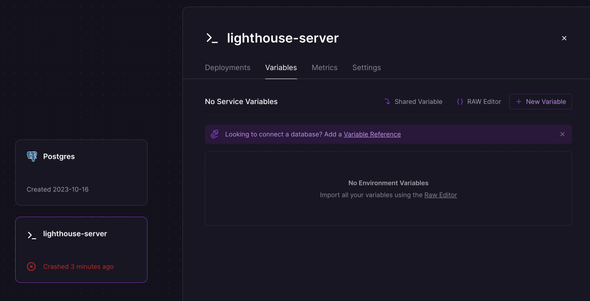
Then, click the “Add a Variable Reference” link and you should see a dropdown open like so:
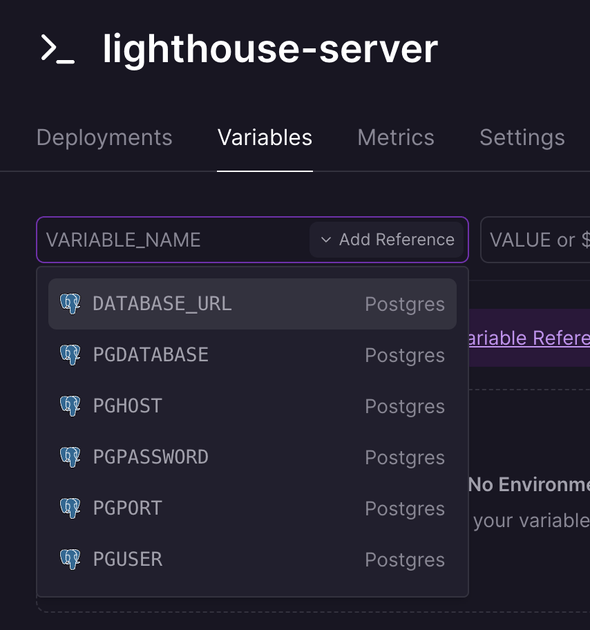
Select the DATABASE_URL option in the dropdown and you’ll see the prefilled values:

Once you click “Add”, the redeploy will get scheduled.
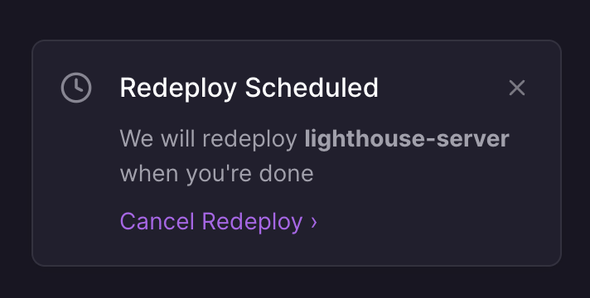
After a couple of mins, our deployment is successful, yay! But how do we view our Lighthouse server? Great question, let’s answer it in the next section.
Step 4 - Add a Domain on Railway
Now, we need to add a domain for our lighthouse-server project. Go into the lighthouse-server Settings tab like so:
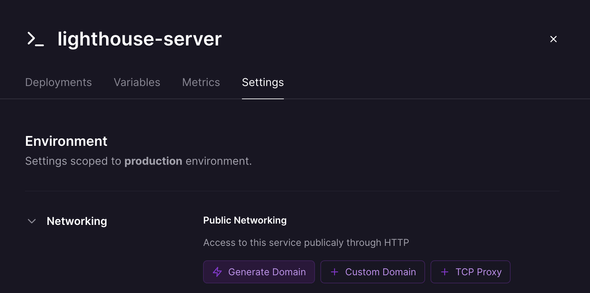
There, you will see “Generate domain” button. Click it and you should see the new domain generated:
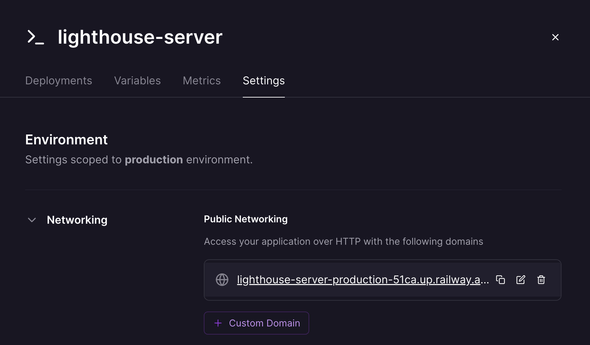
Now, if we visit https://lighthouse-server-production-51ca.up.railway.app/app/projects, we will see a welcome message and instructions to start the configuration of the LHCI server:

Now, let’s configure the server!
Step 5 - Configure Lighthouse CI Server
Now, we are going to step away from the lighthouse-server project and focus on the project we want to measure.
In my case, that’s the blog you are currently reading - Pragmatic Pineapple (here’s the GitHub repo.
I’ll move into the root of the project and create a lighthouserc.json file to configure Lighthouse:
{
  "ci": {
    "collect": {
      "url": ["http://localhost:9000"],
      "numberOfRuns": 5,
      "startServerCommand": "npm run serve"
    },
    "assert": {
      "preset": "lighthouse:no-pwa"
    },
    "upload": {
      "target": "lhci",
      "serverBaseUrl": "https://lighthouse-server-production-51ca.up.railway.app"
    },
    "headful": false
  }
}
This lighthouserc.json specifies from where to collect, what to assert, and where to upload Lighthouse results. In this case:
- We’re collecting from the http://localhost:9000 after 5 runs of Lighthouse, and we are running the blog server with
npm run serve. We’re doing 5 runs to get a better mean value, just in case. - We’re asserting against the
lighthouse:no-pwaset of assertions. That is a set of assertions from Lighthouse containing recommended thresholds for various measurements. (I had to fine-tune the assertions because some of them were breaking my build. I’ll fix them one day 🤞). - And, we’re uploading to a custom LHCI server located at the URL we previously deployed with Railway https://lighthouse-server-production-51ca.up.railway.app.
The important entry in this JSON file is the serverBaseUrl that tells where our LHCI server is located. Now, we can run the LHCI wizard with lhci wizard:
$ lhci wizard

? Which wizard do you want to run? new-project
? What is the URL of your LHCI server? https://lighthouse-server-production-51ca.up.railway.app
? What would you like to name the project? pragmaticpineapple
? Where is the project's code hosted? https://github.com/nikolalsvk/blog
? What branch is considered the repo's trunk or main branch? master
Created project pragmaticpineapple (xxxx-xxxx-xxxx-xxxx-xxxx)!
Use build token xxxx-xxxx-xxxx-xxxx-xxxx to add data.
Use admin token xxxx to manage data. KEEP THIS SECRET!
The wizard configured the remote LHCI server and returned two tokens - build and admin token. Write down both somewhere and keep them safe. We are going to need the build token later in this blog post.
Now, if we go to https://lighthouse-server-production-51ca.up.railway.app, there’s a new project generated:

If we open the project, there’s nothing there.
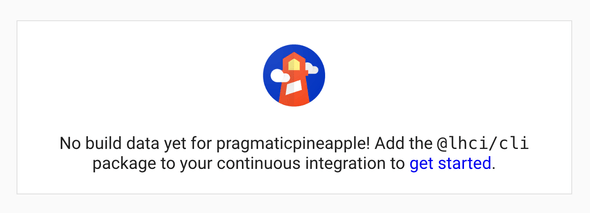
Because we didn’t have any Lighthouse runs that sent the data to our sever, duh! We’ll fix that shortly.
Step 6 - Recording First Lighthouse Result
You’d be tempted to run the Lighthouse CI locally, but let’s hold our horses and create a proper way to do it.
LHCI is meant to be run, well, in the CI environment. My blog is hosted on GitHub, so let’s configure a GitHub Action that runs the LHCI and uploads it to our freshly deployed LHCI server.
First, let’s create .github and .github/workflows directories.
mkdir .github
mkdir .github/workflows
Then, let’s add .github/workflows/lighthouse-ci.yaml which should look like this:
name: Build project and run Lighthouse CI

on: [push]

jobs:
  lhci:
    name: Lighthouse CI
    runs-on: ubuntu-latest
    steps:
      - uses: actions/checkout@v3
      - name: Use Node.js 17.x
        uses: actions/setup-node@v3
        with:
          node-version: 17
          cache: "npm"
      - name: npm install
        run: |
          npm install --legacy-peer-deps
      - name: npm run build
        run: |
          npm run build
      - name: run Lighthouse CI
        run: |
          npm install -g @lhci/cli@0.12.x
          lhci autorun --upload.githubToken="$LHCI_GITHUB_TOKEN" || echo "LHCI failed!"
        env:
          LHCI_TOKEN: ${{ secrets.LHCI_TOKEN }}
          LHCI_GITHUB_TOKEN: ${{ secrets.LHCI_GITHUB_TOKEN }}
This action runs:
npm installnpm run buildto build a production version of my blog, and,lhci autorunthat useslighthouserc.jsonwe defined eariler
One important thing is that we have to provide the LHCI_TOKEN to the GitHub Action. For that, we’ll go into the repository Settings > Secrets and variables > Actions and click “New repository secret”. It should look something like this:
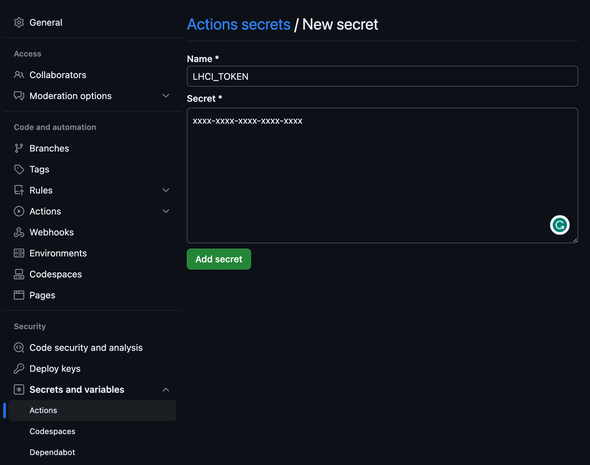
Click “Add secret” and we’re good to make our first push and trigger the LHCI.
Now, whenever there’s a push to my blog repo, a GitHub Action will run and report a Lighthouse score to the Lighthouse CI Server we configured in this blog post. Depending on the project you are running, you might have a different set up than I have, but the concept is similar:
- Prepare your project (install deps)
- Generate the production version of the website
- Run
lhci autorunon it - Preview results on the custom LHCI server
For example, here’s a finished build on GitHub:
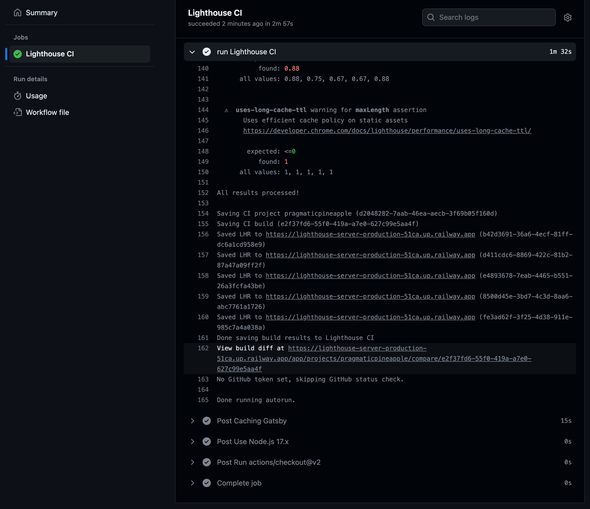
The results are reported to the LHCI server here:

Awesome, we have our LHCI server running, and GitHub Actions reporting on each push to the server our Lighthouse score. Congrats if you were following and got your first result!
What next? I have a bonus step for you!
BONUS: Post a GitHub Commit Status Check
We can have LHCI post a status check to our commits as LHCI finishes with running. That’s a great way to see how the Lighthouse run went without going into the GitHub Action or opening the LHCI server.Here’s an example:
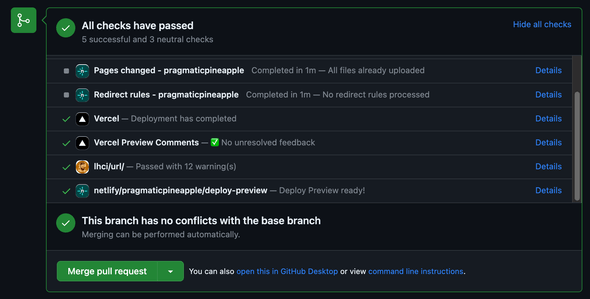
To get started, we need a new GitHub token with the repo:status allowed:
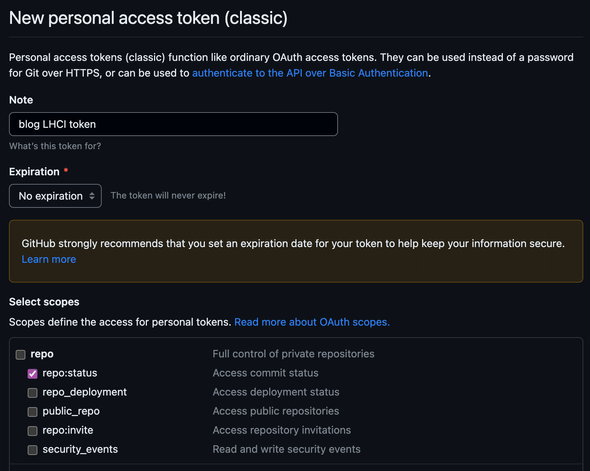
Then, we need to add a new secret LHCI_GITHUB_TOKEN to repository’s Settings > Settings > Secrets and variables > Actions. Notice how we now have two secrets:

And, finally, let’s tell lhci our token by editing the .github/workflows/lighthouse-ci.yaml:
name: Build project and run Lighthouse CI

on: [push]

jobs:
  lhci:
    name: Lighthouse CI
    runs-on: ubuntu-latest
    steps:
      // other steps

      - name: run Lighthouse CI
        run: |
          npm install -g @lhci/cli@0.12.x
          lhci autorun --upload.githubToken="$LHCI_GITHUB_TOKEN" || echo "LHCI failed!"
        env:
          LHCI_TOKEN: ${{ secrets.LHCI_TOKEN }}
          LHCI_GITHUB_TOKEN: ${{ secrets.LHCI_GITHUB_TOKEN }}
We added the --upload.githubToken="$LHCI_GITHUB_TOKEN" option and in the env we made sure LHCI_GITHUB_TOKEN is set properly from the repository’s secrets.
Now, you’ll get a new commit status check whenever a Lighthouse runs for that commit, yay!

Please note, there’s an official Lighthouse GitHub app that can do a similar thing for you.
EXTRA BONUS: Deploy lighthouse-server Automatically to Railway
Let’s connect lighthouse-server to Railway automatically whenever we push to the repo’s main branch. This will be straightforward since all we need to do is to connect GitHub repo to a lighthouse-server Railway project in their UI.
If you haven’t already, now is a good time to publish your LHCI configuration we worked on in step 1. You can also use the one I have over at lighthouse-server repo on GitHub.
Inside lighthouse-server Settings tab in Railway, there’s a section for connecting a GitHub repository like so:
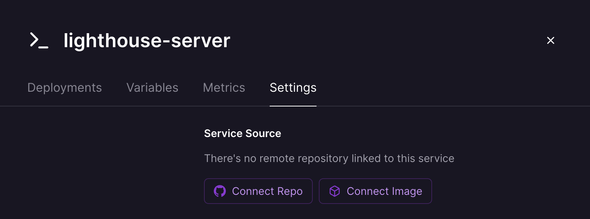
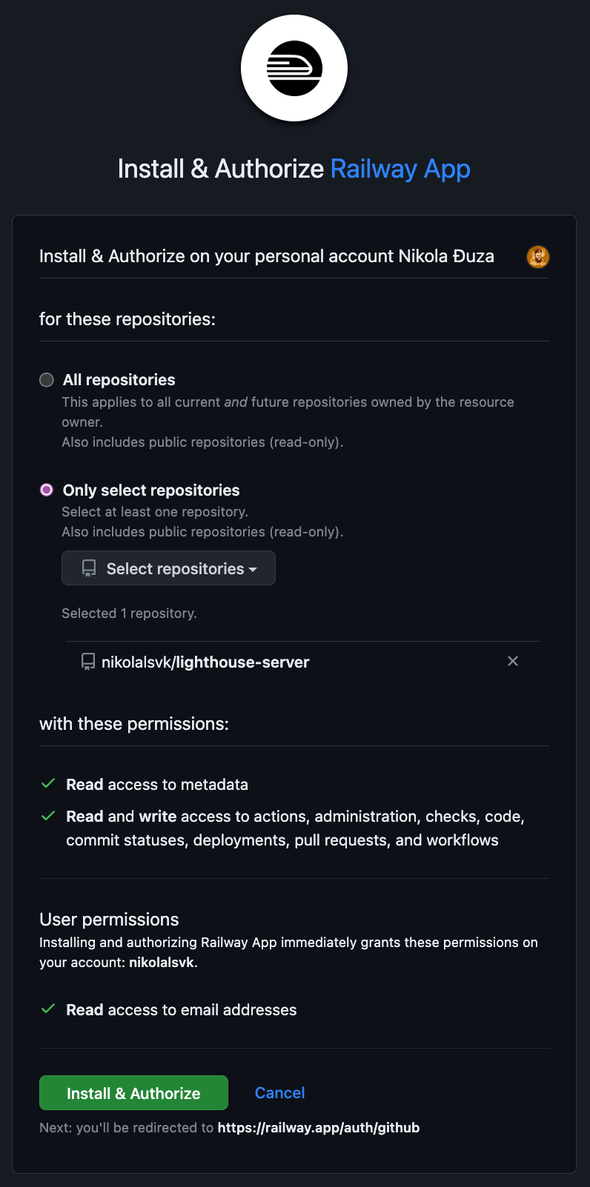
Once clicked, we’ll be taken to GitHub to setup the GitHub Railway app. Here, you can allow access to all repos, or just the ones you want. I selected the lighthouse-server GitHub repo and installed the app.
Once installed, return to the Railway lighthouse-server Settings tab and click “Connect Repo”. Now, you should see the repos you allowed Railway to access. I selected the lighthouse-server GitHub repo and now everything is connected.

Now, every time I push to the repo - Railway will deploy the change, yay!

Summing Up
And that’s it! The Lighthouse CI server is now deployed and configured on Railway together with a database to store your project’s runs. Each commit will run Lighthouse, post results, and ensure your sites are fast and accessible.
You can find all the code for the lighthouse-server on GitHub here.
And the PR where I added the Lighthouse workflow to my blog.
Now, all I (and probably you) need to do is to ramp up that Lighthouse score and keep away from the rocks ⛰ 🔦 🚢.
Thanks for reading, and I’ll catch you in the next one.
Cheers.
Join the newsletter!
Subscribe to get latest content by email and to become a fellow pineapple 🍍